FAQ
Contents
- 0.1 Web link
- 1 Facility Management Application Portal
- 1.1 Install Mobile App
- 1.2 Login Steps
- 1.3 Video for First Time Login
- 1.4 Export Survey Report
- 1.5 What is billing?
- 1.6 Key Consideration before Starting with Billing
- 1.7 Other Useful links
- 2 Mapping Customer(s) or Unit(s) to Bill Plan
- 2.0.1 Leave a Reply Cancel reply
- 2.0.2 Leave a Reply Cancel reply
- 2.0.3 Leave a Reply Cancel reply
- 2.0.4 Leave a Reply Cancel reply
- 2.0.5 Leave a Reply Cancel reply
- 2.0.6 Leave a Reply Cancel reply
- 2.0.7 Leave a Reply Cancel reply
- 2.0.8 Leave a Reply Cancel reply
- 2.0.9 Leave a Reply Cancel reply
- 2.0.10 Leave a Reply Cancel reply
- 2.0.11 Leave a Reply Cancel reply
- 2.0.12 Leave a Reply Cancel reply
- 2.0.13 Leave a Reply Cancel reply
- 2.0.14 Leave a Reply Cancel reply
How to use iSocietyManager in my society?
To use iSocietyManager in your society, your society management committee needs to sign up with us. Connect with us on support@isocietymanager.com for demo and to sign up.
Leave a Reply
You must be logged in to post a comment.
Within a Day. iSocietyManger is easy to configure and you can start using iSocietyManager next day of signing the agreement.
Once your society is activated, you will get Activation SMS and Email on the registered number.
Install the app from Google play store ( For Android phones) or from Apple App Store for iPhone. And you are ready to start.
Leave a Reply
You must be logged in to post a comment.
There are no hidden charges. Only the management committee of your gated community needs to subscribe for iSocietyManager’s services; The app is absolutely free to use for the residents.
Leave a Reply
You must be logged in to post a comment.
The entire process, including the online training process and database creation, takes a week to complete and start full-fledged.
Though you can start using app from the next day of agreement sign off.
Leave a Reply
You must be logged in to post a comment.
The app is very simple to use, and even senior citizens can use the app with ease. If someone finds the navigation difficult, we have an IVR feature that helps in the usage of the app.
The user and guard app interface is designed intuitively, keeping in mind the ease-of-use and maximum convenience.
The app is built for ages 9 to 90, keeping in mind a significant section of senior residents living in gated communities. Whether it’s allowing or denying access to visitors, raising a security alert via the app, raising a complaint, making online payment against the electricity or maintenance bill– the flow is designed to achieve the objective in less than a few clicks.
Leave a Reply
You must be logged in to post a comment.
We use reasonable safeguards to preserve the integrity and security of your information against loss, theft, unauthorized access, disclosure, reproduction, use, or amendment. For more details, read our Privacy Policy
Leave a Reply
You must be logged in to post a comment.
iSocietyManager has a very effective support system
- Online Feedback and Service Support Portal, where user can raise and track the tickets.
- We use iSocietyManager for managing and tracking all user’s complaints and service requests with Turn Around Time Tracking.
- Dedicated relationship manager responsible for product support, training and feedbacks.
- We use Zoho CRM to keep track of our customers’ life cycle.
Leave a Reply
You must be logged in to post a comment.
Resident/ Customer / Tenant Mobile App can be downloaded for:
- iPhone: Search iSocietyManager on Apple Play Store.
- Android: Search iSocietyManager on Apple Play Store.
You can also Download App by opening https://bit.ly/2GQsFmb on your mobile.
Web link
Occupants who wants to use features without mobile app can directly open the link in browser:
https://isocietymanager.com/user/
Click on Skip, if you don’t want to use app tour, then login UI will be displayed.
Leave a Reply
You must be logged in to post a comment.
Facility Management Application Portal
Resident Login Process Steps for iSociety
Install Mobile App
iPhone / Apple Phone / iOS
- Go to App store -> search “iSocietyManager”
- Download Apple App store URL – https://itunes.apple.com/in/app/isocietymanager/id1139733523
Android
- Go to play store -> search “iSocietyManager”
- Download google play store URL – https://play.google.com/store/apps/details?id=com.sumasamu.iSocietyManager
Follow the installation steps as per your mobile platform i.e. Android or iPhone
Web Browser – Chrome/ Safari / Mozilla
- Open URL https://isocietymanager.com
- Click on Sign In Option from Menu
Login Steps
Get Login Details
For Accessing Mobile App, you will need login credentials. The credentials are sent as SMS Or
Email vai Activation from your Society’s Administration. If not received, please contact Admin.
Start Using Facility Management Application Portal App
Once you get the login credentials you can log in with your registered mobile number or email with the Society. Below are steps:
- Once you have installed the Mobile, Launch it by clicking the app icon on the Mobile Screen.
- Enter your login credentials in the Screen displayed
- If you don’t remember the password click on Forgot Password Or use OTP Log in
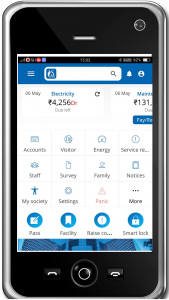
On successful login, you will see the home page similar to:
Video for First Time Login
Leave a Reply
You must be logged in to post a comment.
Survey can be used in many ways like :
- Take the opinion of our customers. Example Do you want the Club to be opened between 12 to 4 pm?
- Collect information like Share your tenant details etc.
- Take feedback from Customers, for example – Customer Satisfaction Survey of Housekeeping, Security, etc.
Leave a Reply
You must be logged in to post a comment.
In Survey Dashboard page, you see a list of all Surveys.
- To view the response of any Survey select Status from Survey sub-menu

- On click of Status, you can see the Survey response summary. You can view the details question wise by expanding at the question level.

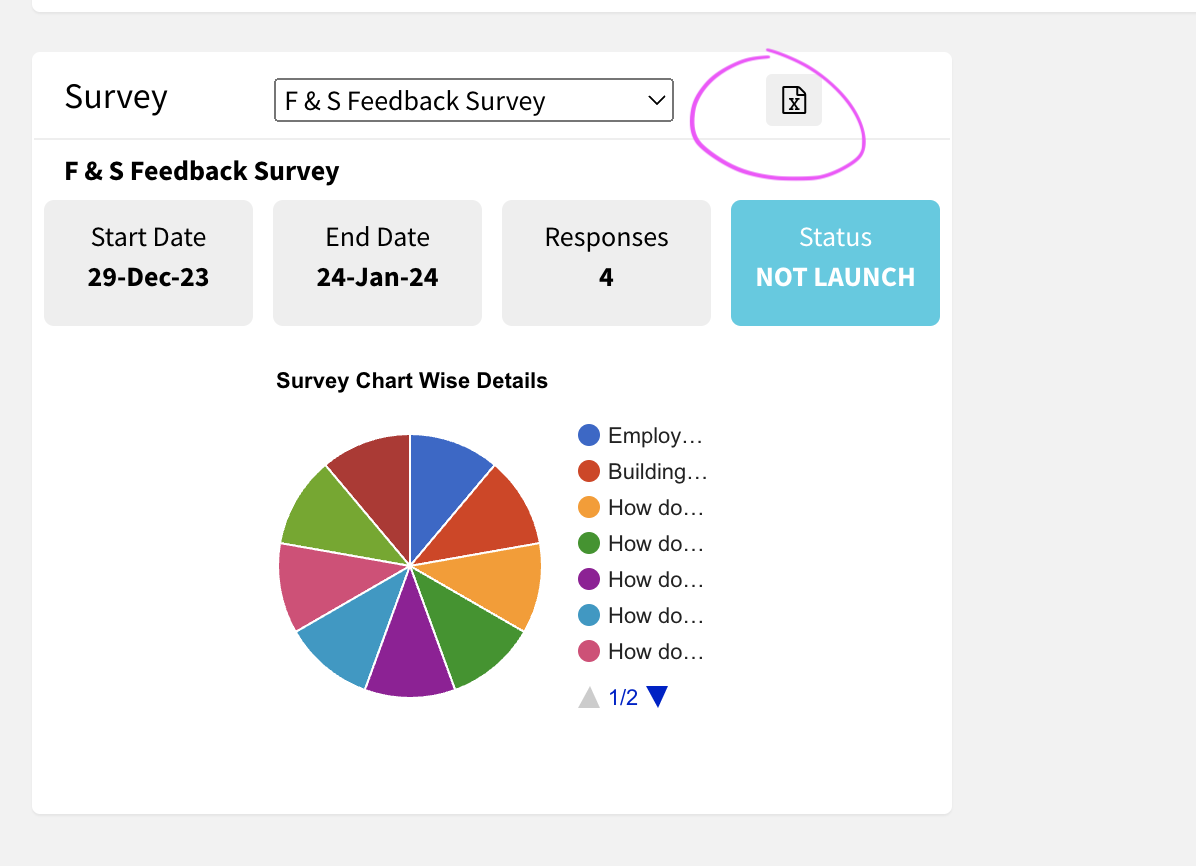
Export Survey Report
You can export Survey response from Dashboard Survey Detail or from Survey Detail View
Dashboard
Select the survey and click on xls icon
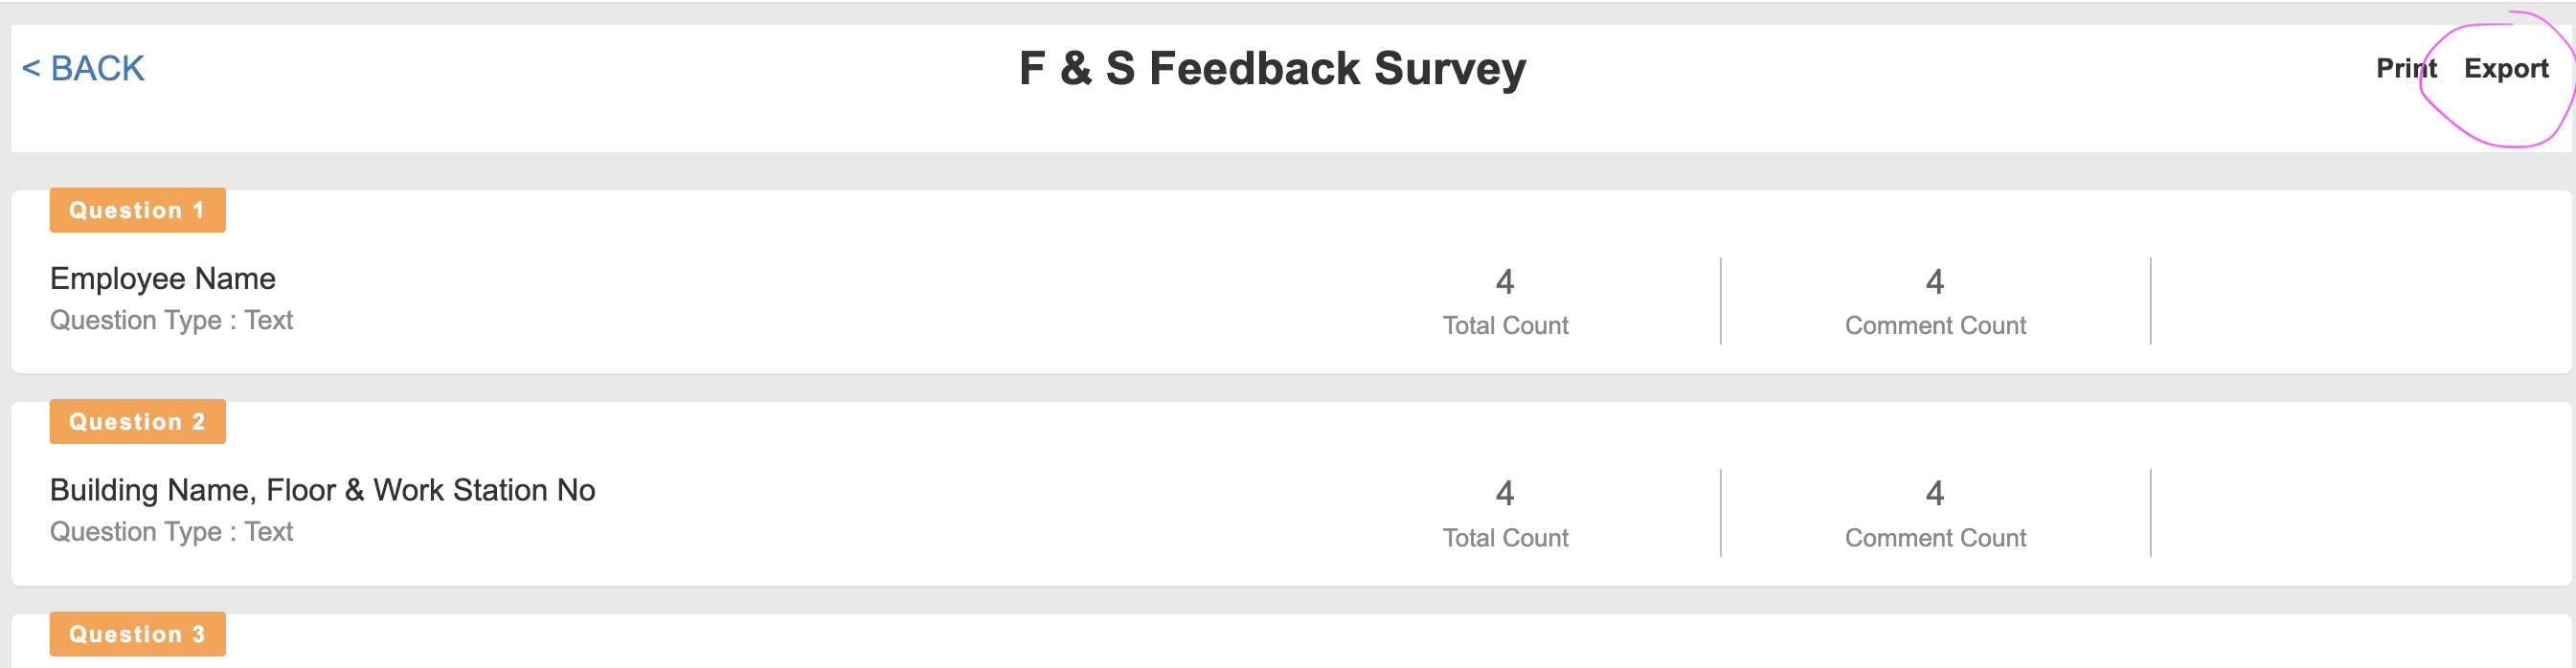
Survey Detail
Open Survey & Click on export
Leave a Reply
You must be logged in to post a comment.
Survey launching is a 2 step process:
- Create a Survey
- Launch Surve
1. Create a Survey
a) After login, Go to Survey ( More -> Survey)

b) On click of the Survey, you can see the Survey Home Page. This display list of all Surveys with the details – number of responses, status, launch date, closing date.

c) Click on + ( Plus) button on the left side to create a new Survey

d) You have to fill Name, Description, and add questions as per the nature of your Survey. You can add questions of your choice. Answers options are prefilled for your help. You can change as per your need.

e) You can select the Comment Field option and add more questions by pressing the + button on the right side.

f) Click on Save button to save the Survey. Now you can see the Newly added Survey in Survey Dashboard Page
Launch Survey
a) To launch a Survey, go to Survey Home Page/ Dashboard and click on the Survey Sub Menu
On Survey Sub Menu, you can do below operations
- Status – Check the status of Survey – Responses, Report etc.
- Edit – Edit the Survey like closing date, description, question etc.
- Launch – Launch the Survey so that users can participate in the survey and share their feedback
- Notify – To notify the participants
- Delete – To remove the survey.
b) Select the Launch option and choose the options as per your need.

c) Click on Go button to launch the survey. Now Survey will be visible to residents and they will be notified.
Leave a Reply
You must be logged in to post a comment.
If you are the admin with the rights of SMS Read, you can see the list of SMS which are sent for your community.
- Go to Message -> SMS

- The SMS list is displayed like the image below. You can filter the SMS by Service, Unit Number.

Leave a Reply
You must be logged in to post a comment.
Security team need not to login again, if he has logged once in the Visitor Management App. Sometimes the security team has to login again due to:
- New Device
- Logout
- New App installation
Facility Admin, having Change Password permission, of your society can reset the password of the Security login in the Visitor App.
Refer:
Leave a Reply
You must be logged in to post a comment.
Many times there is a need to change the password of the facility team. Admin, having Change Password Permission can reset the password of any user.
- Open the change password UI from Customer-> Change Password.
- Start typing the name/phone no of the user for which password to be changed and then type a new password. The system will automatically send SMS on User phone number and email with new password.
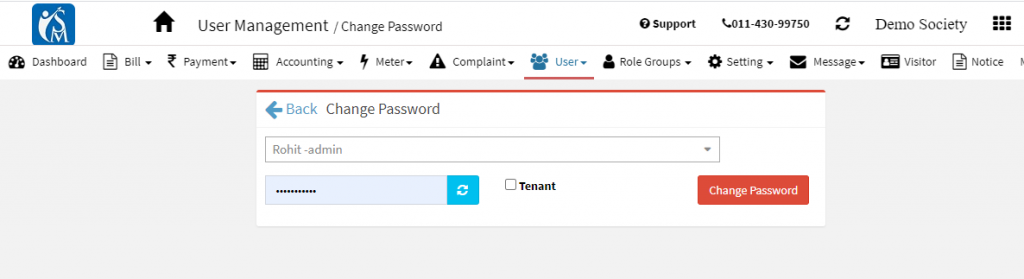
Note:- User can set her own password after login and going to Profile (Top Right Face Icon ->Profile)-> Change Password
Leave a Reply
You must be logged in to post a comment.
What is billing?
Also called invoicing, billing is the process of requesting payment from a customer, by generating an invoice to recover the money resulted from the service or sale.
Key Consideration before Starting with Billing
Before getting into the details of steps of bill generation, User has to decide on below points:
- Bill Plan: You need to generate a single bill or need to generate different bills for different groups. For example, you can decide if CAM, Electricity charges to be included in the same bill or there should be separate bills for Electricity & separate bills for CAM.
- Tariffs: What are the different tariffs/ rates that will be applicable like – Grid Charge, DG Charge, Maintenance Charge, Delayed Payment Charges, etc.
- Bill Cycle: What is the period of a bill. For example – start date, end date for a bill. Any cycle can also contain – Due Date, Payment consideration details, etc. so that users have better control and change as per the needs.
You have the flexibility to add and configure as many bill plans as you want. So if any user wants to generate CAM and Electricity Bills separately he can configure 2 bill plans say CAM, & Electricity for their commercial or residential properties. Similarly, charges also can also be configured as per your needs.
Other Useful links
What is different data input required to start billing?
What are different bill formats?
How to configure payment conditions for bill plan?
How to map customers to a bill plan?
How to add tariff for bill generation?
How to Add/import meter reading?
Leave a Reply
You must be logged in to post a comment.
If you want to create more than one type of bills then only you need to configure bill plan. Below are the steps to add a new bill plan:
- Go to Menu -> Bill -> Bill Plan Configurations

- Enter the details for the plan and save to add/configure the bill plan.

- To start using new Bill Plan, you need to map the same with the respective Role. Only mapped roles will be able to view that bill plan
I am not able to view the new bill plan after login as billing admin?
Leave a Reply
You must be logged in to post a comment.
Mapping Customer(s) or Unit(s) to Bill Plan
Billing System gives users the flexibility to map a unit as and when required with a bill plan. The unit is billed for that bill plan only when that Unit is mapped to that bill plan. There are situations where Units are mapped to Electricity Bill only when the unit is occupied by some tenant.
With few clicks billing admin can map/ unmap unit from a Bill Plan.
- Go to Bill-> Billing Configuration
- Click on User Mapping and then select a particular Bill Plan then Units to be mapped.

Leave a Reply
You must be logged in to post a comment.
If there are more than one bill plans, sometimes there is need to add payment condition on the bill plan based on the other bill plan. For example, suppose you want that residents should recharge electricity meter only when, they have no outstanding dues in Maintenance.
The steps to configure payment conditions for a bill plan are:
- Go to Bill-> Billing Configuration
- Click on Configurations

You can add below conditions for the Bill plan:
- Minimum Amount
- Maximum Amount
- Decimal Places
- Fixed Amount
- Minimum Credit
- Check the previous due amount of — another bill plan
- Remarks
- Disable Edit Amount
- Block payment before due date
Leave a Reply
You must be logged in to post a comment.
In iSocietyManager, you can allow a billing plan to be used only by a user or role. This especially becomes important in projects where different accountants or persons are responsible for maintenance, electricity, or ad-hoc bills.
To map a role with a bill plan, follow below steps:
- Go to Role-Groups-> Assign Bill Plan Permission

- Select the Bill Plan and then check the Roles which you want to give that bill plan permission

- Login as admin or refresh if you are already logged in. Now you should be able to see the new bill plan in your options.
Leave a Reply
You must be logged in to post a comment.
You can use your choice of Payment Gateway for your Society or Commercial Complex Billing.
- Contact your choice of payment gateway provider bank/company (Axis Bank, PayTM, ICICI bank, etc.)
- Sign an Agreement with your chosen payment gateway provider
- Share technical detail with iSocietyManager for integration.
- If your choice of Payment Gateway already in the listing of iSocietyManager, then you can configure it yourself from the Setup UI.
Leave a Reply
You must be logged in to post a comment.
An accounts receivable aging report is a record that shows the unpaid invoice balances along with the duration for which they’ve been outstanding. This report helps businesses identify invoices that are open and allows them to keep on top of slow-paying clients.
In iSocietyManager, User with Read Permission of Bill Aging can get this report.
The steps are:
- Go to Bill -> Bill Aging Report

- You will see the input fields for the Invoice Aging report. The different options are:
- Bill Plan: Choose the bill plan for which you want to get the Invoice aging report.
- Till Date: Date till which you want to get an outstanding age.
- No. of Days: How many days old account receivables you want to get. For example, if you choose 90 days then Units having dues older than 90 days will be shown.
- Aging Interval: What period of interval you want to distribute defaulters.
- Minimum Amount: The amount below which you want to ignore defaulters.

- For Example, if you will choose No of Days – 90 and interval 30 Days, aging report will have the below details.
| Flat no | Display Flat no | Name | 0 – 30 days | 31 – 60 days | 61 – 90 days | 90+ days | Total |
Leave a Reply
You must be logged in to post a comment.
iSocietyManager focuses on personalized experience to its users. Visitor Management System is used by many different types of clients. Whether it’s society, office complex, corporate park, visitor management process vary.
The details you capture for a visitor can vary from time to time. For example, In the COVID-19 pandemic there is a need of capturing temperature and mask.
You can customize Visitor UI as per your need. The steps are:
- Login with Admin with permission of customizing Visitor and go to Settings -> Set Up -> Visitor

- Click on Guard Visit Form, then you can select or add fields as per your choice and requirement.

Using the above UI you can
-
- Move any field from hidden to Selected one
- Hide any selected field
- Add a new field from Create Field.
- You can add conditions at the field level. Click on Field Level Menu as in the below image.

You can do below options at field level
-
- Mark as Required
- Mark Searchable — In Case you want to auto-populate the fields
- Hide field
- Add Precondition – If you want to show this field if on the basis of Visit Purpose selection
- Add Length – Want to have characters allowed at field level
Leave a Reply
You must be logged in to post a comment.
You can add or modify the purpose options in Visitor Guard Management App.
- Go to Settings -> Set Up -> Visitor
- Chose Guard or Self Registration form, for which you want to add purpose. Then select Add Purpose option against Purpose field.

Leave a Reply
You must be logged in to post a comment.
iSocietyManager is a role-based System. If you have admin rights to create users and roles for your site, you can create new admin login in the System.
- To view the existing admin or facility Users. Go to Role Groups -> View Facility Users

- The list of all admin user will be displayed

If you have admin rights to create users and roles for your site, you can create new admin login in the System.
- To view the existing admin or facility Users. Go to Settings -> List of Role
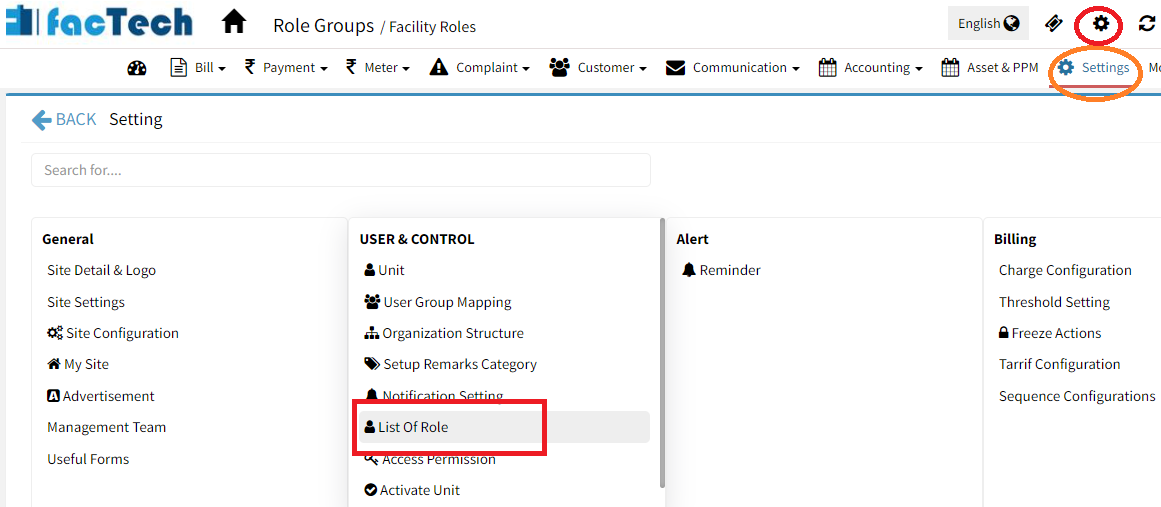
- In the below UI Click on Staff Tab – to view all Staffs. Then click on Admin to see the list of admins. Refer How to add new role?
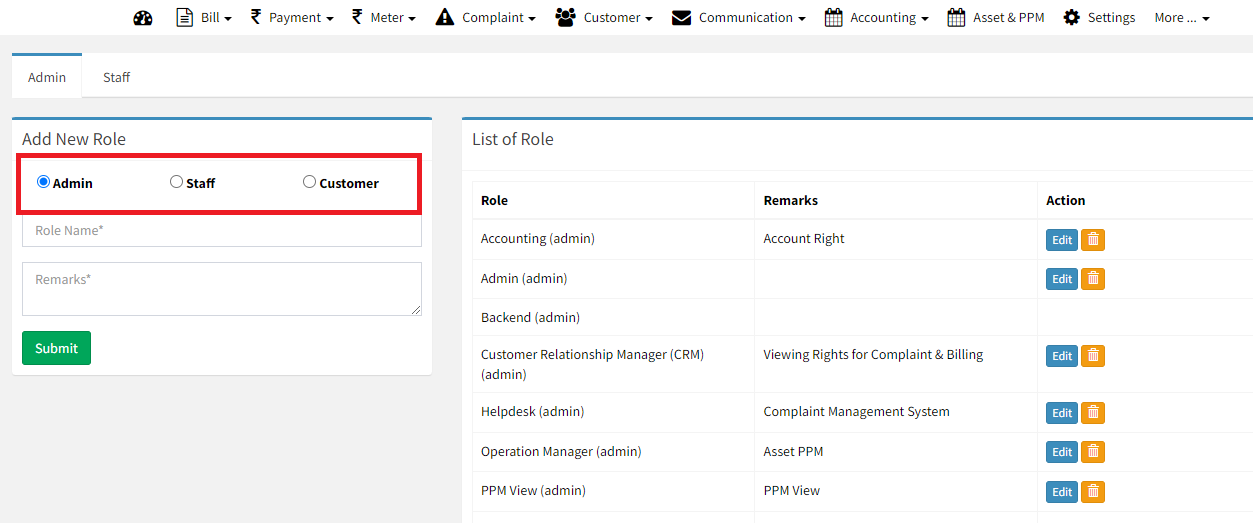
- The list of all admin users will be displayed
- If you don’t find the name in the list you can click Add New Admin button. Enter the details in the screen shown:

- Login Id will be Mobile No or Email entered while adding new Admin User.
Note: Email Id is recommended as support tickets and other communication will be through this email.
-
- You can choose the role you want to map to the new User.
- If the same login id is already used in other roles – say, Complaint Supervisor, etc., then check Allow duplicate number?
- The new login person can use OTP, or if you want to set specific password, you can use Change Admin password
Leave a Reply Cancel reply
You must be logged in to post a comment.
If you have admin rights to create users and roles for your site, you can enable or disable new admin login in the System.
- To view the existing admin or facility Users. Go to Role Groups -> View Facility Users
- The list of all admin user will be displayed
- Click on disable against the admin User which you want to disable.
If you have admin rights to create users and roles for your site, you can create new admin login in the System.
- To view the existing admin or facility Users. Go to Settings -> List of Role
- In the below UI Click on Staff Tab – to view all Staffs. Then click on Admin to see the list of admins. Refer How to add new role?
- The list of all admin users will be displayed
- If you don’t find the name in the list you can click Add New Admin button. Enter the details in the screen shown:
- Login Id will be Mobile No or Email entered while adding new Admin User.
Note: Email Id is recommended as support tickets and other communication will be through this email.
-
- You can choose the role you want to map to the new User.
- If the same login id is already used in other roles – say, Complaint Supervisor, etc., then check Allow duplicate number?
- The new login person can use OTP, or if you want to set specific password, you can use Change Admin password
Leave a Reply Cancel reply
You must be logged in to post a comment.
Leave a Reply Cancel reply
You must be logged in to post a comment.
Leave a Reply
You must be logged in to post a comment.
If you have admin rights to create users and roles for your site, you can create new admin login in the System.
- To view the existing admin or facility Users. Go to Settings -> List of Role
- In the below UI Click on Staff Tab – to view all Staffs. Then click on Admin to see the list of admins. Refer How to add new role?
- The list of all admin users will be displayed
- If you don’t find the name in the list you can click Add New Admin button. Enter the details in the screen shown:
- Login Id will be Mobile No or Email entered while adding new Admin User.
Note: Email Id is recommended as support tickets and other communication will be through this email.
-
- You can choose the role you want to map to the new User.
- If the same login id is already used in other roles – say, Complaint Supervisor, etc., then check Allow duplicate number?
- The new login person can use OTP, or if you want to set specific password, you can use Change Admin password
Leave a Reply
You must be logged in to post a comment.
If you have admin rights to create users and roles for your site, you can enable or disable new admin login in the System.
- To view the existing admin or facility Users. Go to Role Groups -> View Facility Users
- The list of all admin user will be displayed
- Click on disable against the admin User which you want to disable.
If you have admin rights to create users and roles for your site, you can create new admin login in the System.
- To view the existing admin or facility Users. Go to Settings -> List of Role
- In the below UI Click on Staff Tab – to view all Staffs. Then click on Admin to see the list of admins. Refer How to add new role?
- The list of all admin users will be displayed
- If you don’t find the name in the list you can click Add New Admin button. Enter the details in the screen shown:
- Login Id will be Mobile No or Email entered while adding new Admin User.
Note: Email Id is recommended as support tickets and other communication will be through this email.
-
- You can choose the role you want to map to the new User.
- If the same login id is already used in other roles – say, Complaint Supervisor, etc., then check Allow duplicate number?
- The new login person can use OTP, or if you want to set specific password, you can use Change Admin password
Leave a Reply Cancel reply
You must be logged in to post a comment.
Leave a Reply
You must be logged in to post a comment.
How to get Started with iSocietyManager
How to Register a new apartment/society?
How to login as Facility/Admin user?
Whats is Unit, Cluster, Tower – Brief description
How to change Logo of Apartment/Society?
How to change Image of Apartment/Society?
How to add Management/Facility/ photo with designation?
How to Add Guidelines/Rules?
How to add useful Forms?
What is Dashboard? Overview of Dashboard
Unit/user management :-
How to Society Configuration steps?
How to add new unit manually?
How to import units in bulk?
How to add tenant details manually?
How to import tenant in bulk?
How to activate unit/user? *when we add manually then user will get activation at that only.
How to add vacant details?
How to update existing records manually?
How to update existing records in bulk?
How to change password for the user/unit?
Complaint Management :-
What is complaint Dashboard?
How to customize complaint category & sub Category?
How to Add complaint Staff/update existing staff?
(in current situation staff phone number is mandatory)
How to configure complaint escalation?
How to assign complaint to staff, update status of complaint,
closing of complaint,communication with unit/tenant?
How to assign job card.
How to add complaint on behalf of unit?
How to search complaint by complaint number, status, specific date range,
exporting complaint data, using builder report, pictorial representation?
How to add custom complaint status?
How to enable automatic assign staff feature?
How to enable automatic status feature?
How to enable OTP feature?
How to enable add complaint alert?
How to customize hours for reopening of complaint?
Notice :-
How to add Notice with or without attachment of file or Video?
How to add flash Notice?
How to disable flash Notice, delete notice?
How to see read reports of Notices and flash Notices.
Billing :-
Billing Elaborate introduction that includes Tariff, bill plan, individual charge, etc.
Step 1 : How to Add Tariff? note* without tariff we can't add bill plan?
Step 2 : How to add bill plan & mapping tariff?
How to add bill plan?
How to assign bill plan permission?
How to associate user with bill plan?
How to add Billing Cycle?
How to import bulk & associate with bill plan?
How to add individual charges?
How to import bulk user for individual charges?
How to verify bill amount using bill summary report?
How to change sequence number for bill format?
How to add invoice format?
How to map invoice format?
How to preview bills before generating?
How to generate bill individually?
How to preview bills tower wise?
How to generate bill for all user?
How to cancel bill invoice?
How to regenerate the bills with the same invoice sequence number?
How to define area for generating bills for Common Area Maintenance?
How to configure first bill date for bill generation?
How to update the first bill date for all the user?
How to send bill on email address?
How to send bill amount on SMS?
How to send payment due reminder email/SMS?
How to add Manual Bill Plan?
How to generate GST Report?
What is Bill Pro - Active Report?
How to filter Payment dues report?
How to customize automatic due reminder?
How to export Bill Ageing Report?
How to see which bills are not generated?
How to see bill transfer report?
How to delete all the bills?
How to restrict previous bill skip?
How to round up amount figure?
Template
How to Add bill template?
How to make changes to bill template?
How to map template with bill plan?
How to change SMS template?
How to regenerate bill changes in bill format?
Meter
What is meter dashboard?
How to add reading manually?
How to import reading in bulk?
How to see reading of unit?
How to see reading for all units for particular date?
How to change Meter?
How to enable Multiple Meter?
How to import Multiple Meter Reading?
How to import Meter?
How to import Meter Change?
How to see online meter reading report?
Payment
How to Add Payment?
How to make Credit Entry?
How to make Debit Entry?
How to import opening balance?
How to import bulk payment Entry, Credit Entry, Debit Entry?
How to search payment for unit?
How to export payment records?
How to see payment report?
How to see cancel payment report?
How to make cheque bounce Entry?
How to send SMS/Email for payment?
How to cancel payment?

Ledger
How to see Ledger for Unit?
How to see complete Ledger report for Unit?
How to generate ledger for specific date range?
How to export Ledger?
How to see statement of account?

Tally
How to post bills to Tally?
How to post Payment to Tally?
How to post Debits/Credits Notes to Tally?
Role groups
How to add new facility user?
How to create new role?
How to assign permission to new/existing role?
How to send password to facility user?
How to change permission for existing role?
How to change to disable feature of resident app?
Message
How to see if emails delivered or not?
How to see if SMS delivered or not?
Survey

How to create Survey?
How to customize survey categories?
How to launch Survey?
How to customize date period for survey?
How to see the response for survey?

VMS

How to download Visitor Management System(VMS) App?
How to login VMS on browser?
How to setup Guard visitor form?
How to setup Self Check-In Form?
How to add visitor entry?
How to verify pre-planned visitor entry?
How to see if visitor is excepted/rejected?
How to accept visitor behalf on resident?
How to track the report of visitors?
How to add new staff for attendance?
How to add staff category?
How to enable face attendance?
How to export attendance report?
How to enable self registration form - Check In/Out?
Thanks for finally writing about > How to add new bill plan? – Facility Technology < Liked it!